Sync Setup - Presonus Studio One on a separate computer
Introduction
The easiest way to provide Video Sync with incoming MTC/MMC data from another computer, is to setup a network MIDI connection using Apple's built-in Audio MIDI Setup tool to transmit all the MIDI data between the two computers. It is usually not necessary to buy a separate MIDI interface and cables to connect the MTC sending and receiving computers, although a cabled MIDI connection can be used if preferable. Since MIDI was developed in the 80s, it has a really low data rate. Therefore it should not be a problem to use network MIDI in a Wi-Fi environment.
A cabled ethernet network connection is the preferred method for reliability.
The following instructions assume that you have two Apple Macs: one with Video Sync; the other with Studio One.
Although not listed as a separate DAW Sync Setup Option, this Network MIDI setup incidentally also works flawlessly with Video Sync on the same computer.
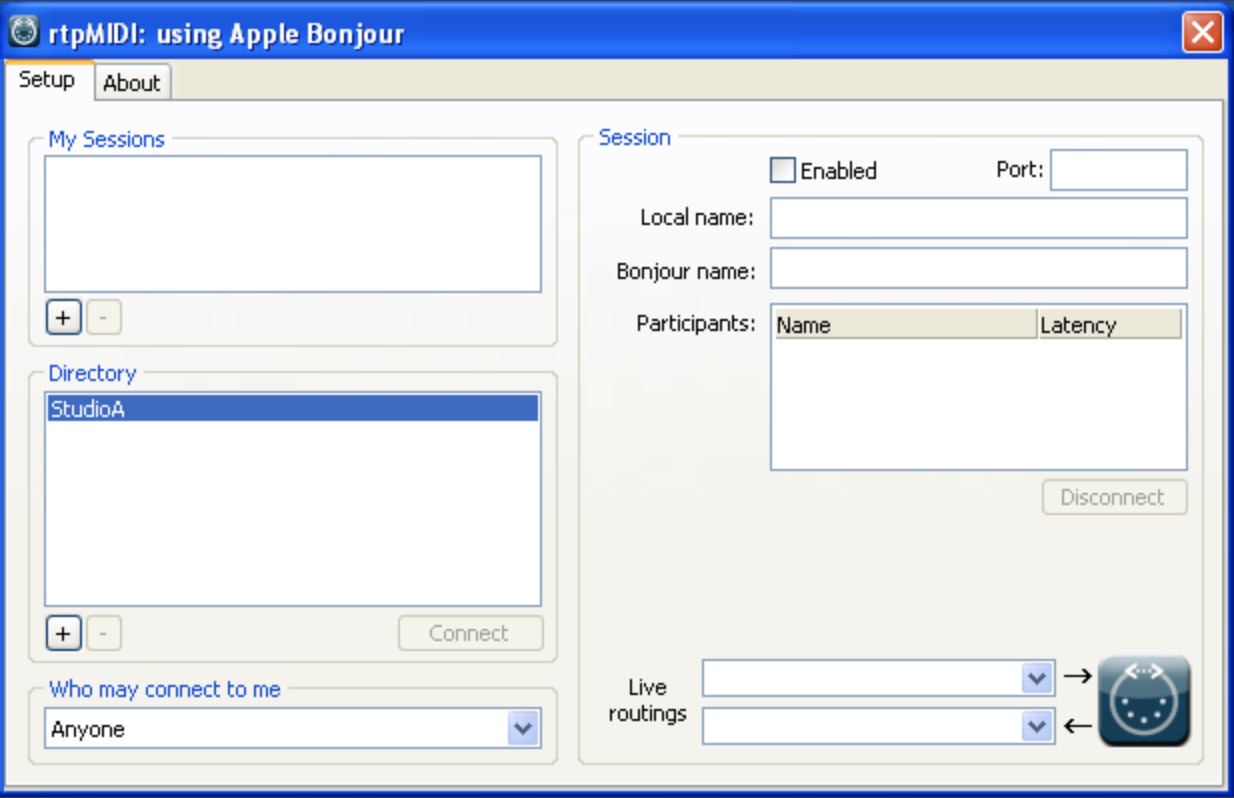
If the Studio One computer is a PC, rtpMIDI is a free PC equivalent to Apple's network MIDI implementation. Download & setup instructions can be found here: http://www.tobias-erichsen.de/software/rtpmidi.html
Our thanks to Tobias Erichsen for this invaluable tool.
 {width=80%}
Configuring Audio MIDI Setup on the Studio One computer to send MTC & MMC over the Network
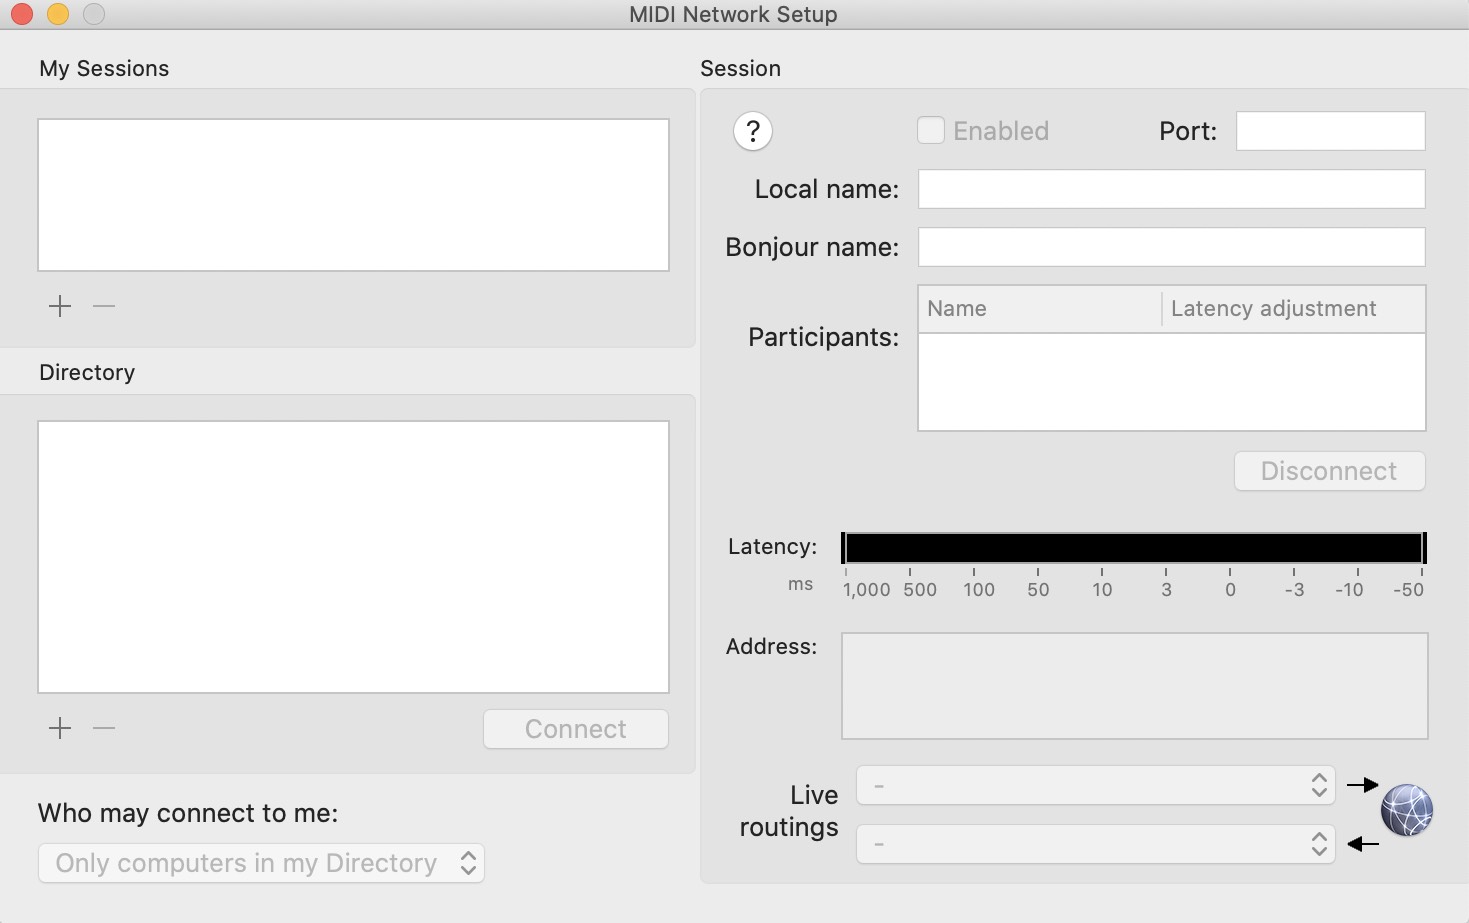
On the Studio One computer, go to Applications → Utilities & open Audio MIDI Setup. The MIDI Network Setup window should appear:
 {width=80%}
If the window is not shown, select Window → Show MIDI Studio & then from the MIDI Studio menu that appears, select Open MIDI Network Setup.
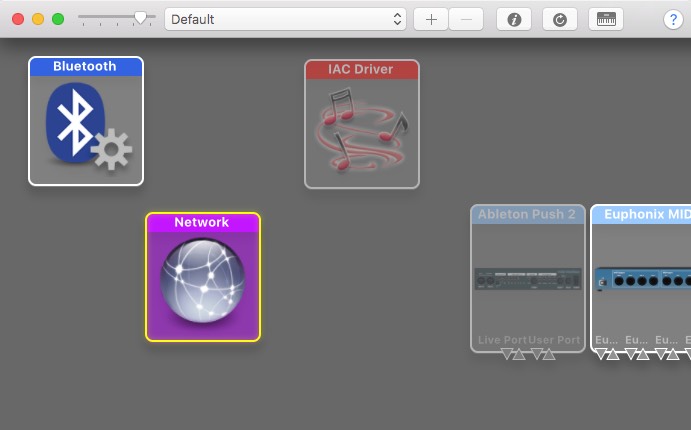
In older versions of Audio MIDI Setup where this option is not present, it can accessed by double-clicking the Network device icon in the default MIDI Studio window.
 {width=80%}
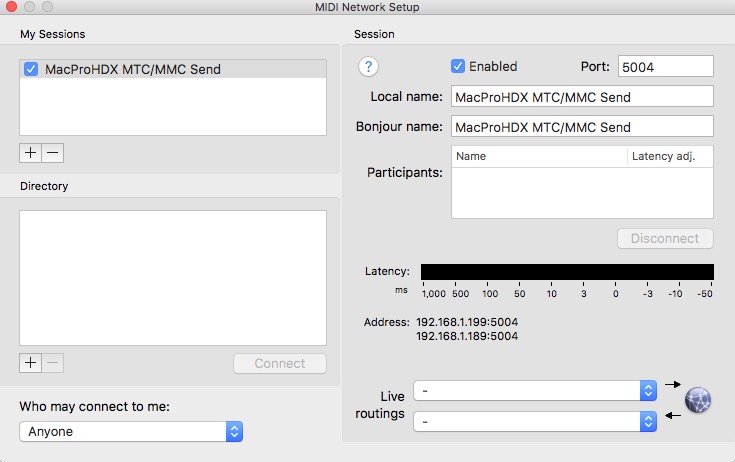
In the My Sessions field top left, create a new session by clicking +.
Click the checkbox to the left of the name to enable the session.
Rename it (computer 1 name) MTC/MMC Send (or something similar) - e.g. MacProHDX MTC/MMC Send This name will automatically be copied to the Local name field.
The Local name is the name that appears on this local computer.
Copy this name & paste it in the Bonjour name field.
The Bonjour name is the name that is displayed on the other computers in the network.
Although a session can be used in either input or output directions, to avoid confusion it is recommended to stick to one direction by noting this in the session name, e.g. Send or Out.
MTC & MMC do not require separate Network sessions made for each - they can share the same session.
Set the Port: field to 5004.
Select Anyone in the Who may connect to me dropbox on the bottom left.
 {width=80%}
Configuration is complete for the Studio One computer. This should not need to be set up again in future.
Configuring Audio MIDI Setup on the Video Sync computer to receive Network MTC & MMC
On the Video Sync computer, close Video Sync & open Audio MIDI Setup. Open the MIDI Network Setup window as described above. The Studio One computer should be visible in the Directory field - showing (computer 1 name) MTC/MMC Send with a green active circle to the left.
 {width=80%}
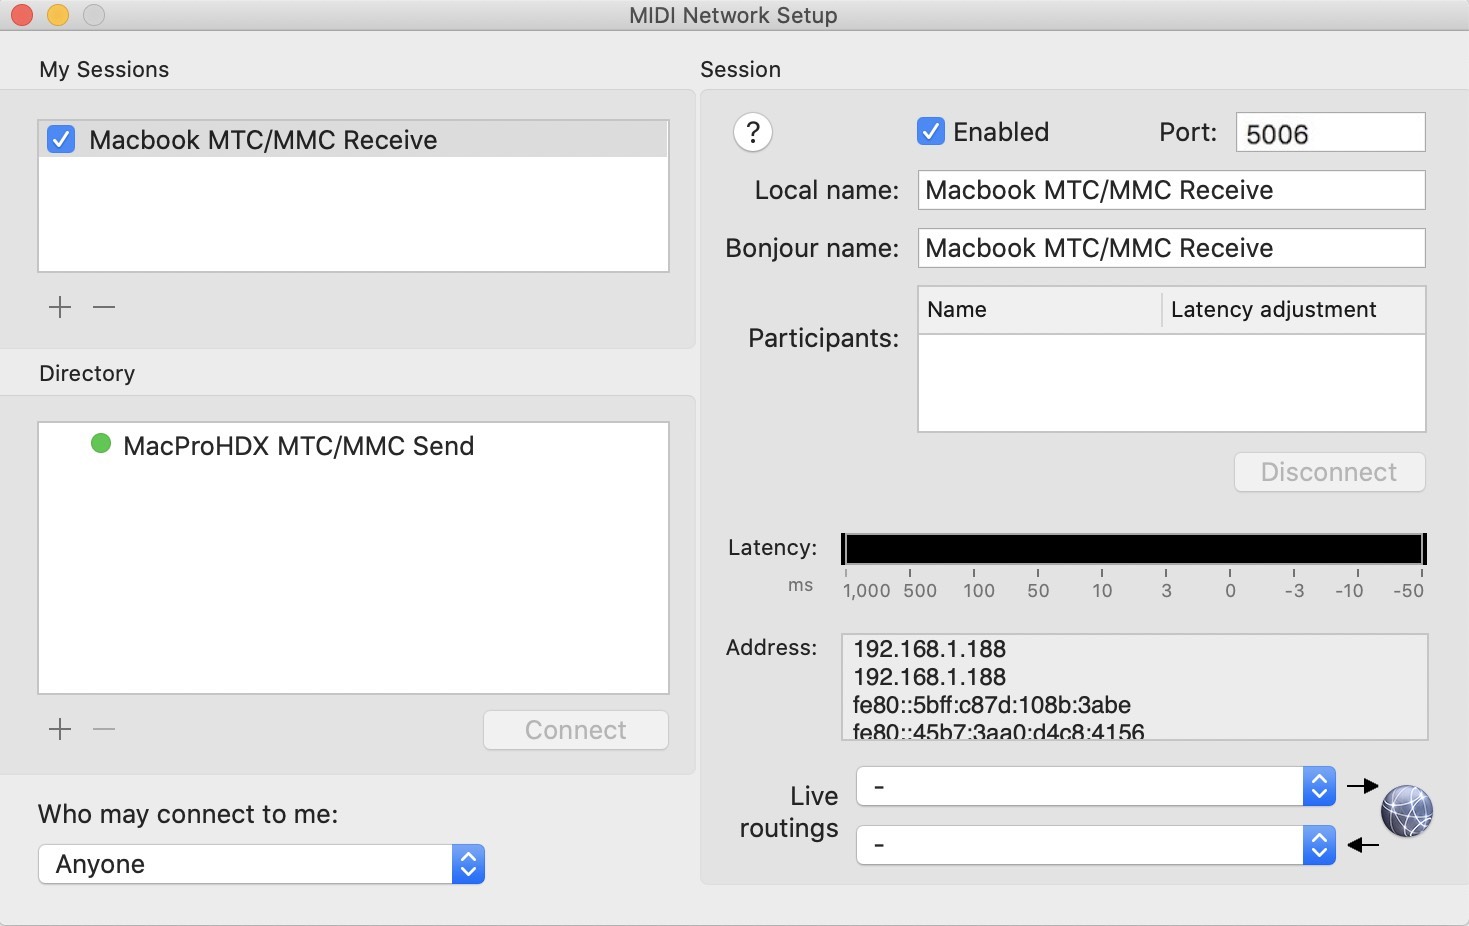
In the My Sessions field top left, create a new session by clicking +.
Click the checkbox to the left of the name to enable the session.
Rename it (computer 2 name) MTC/MMC Receive (or something very similar)- eg MacbookPro MTC/MMC Receive.
This name will automatically be copied to the Local name field.
Copy this name & paste it in the Bonjour name field.
Set the Port: field to 5006.
Select Anyone in the Who may connect to me: selection field on the bottom left.
 {width=80%}
Connecting the Network MTC/MMC Sessions
Now that the two Sessions have been created, the next step is to connect them.
The steps until this point should not need to be done again in future. The following simple steps to connect only need to be done once every time the computers are restarted.
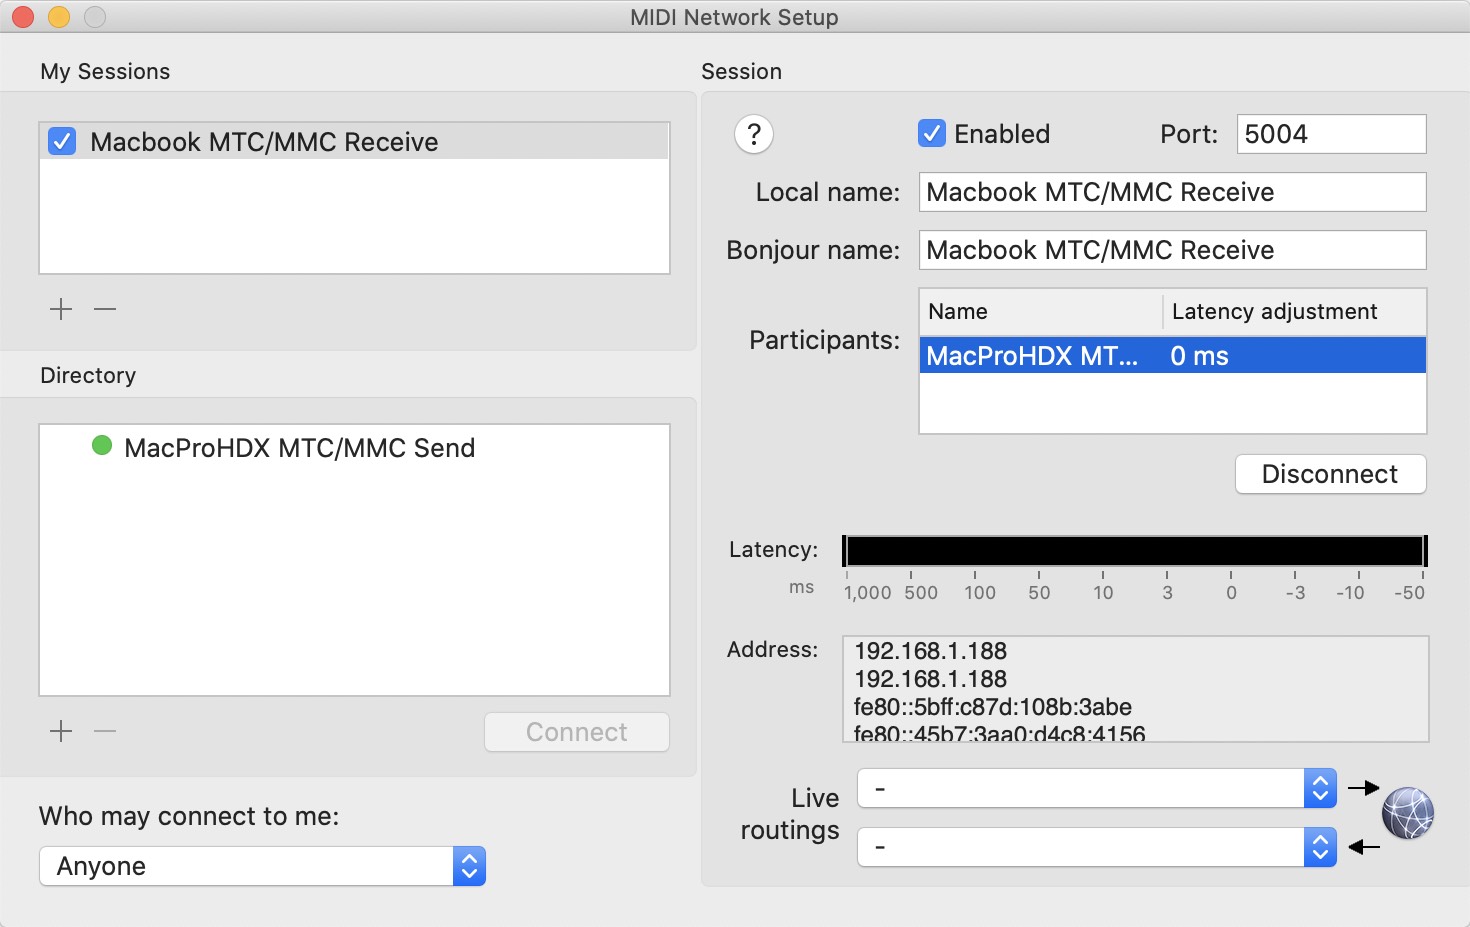
With the (computer 2 name) MTC/MMC Receive session selected in the My Sessions box, select (computer 1 name) MTC/MMC Send in the Directory field, and hit the Connect button.
(computer 1 name) MTC/MMC Send should now apper in the Participants: field on the right.
 {width=80%}
Regardless of which computer is chosen to Connect, only one of the computers needs to connect to establish the connection.
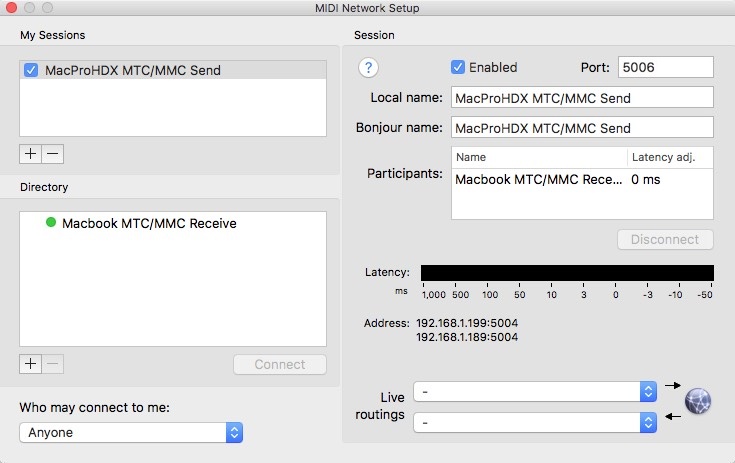
On the Studio One computer, (computer 2 name) MTC/MMC Receive should now also be seen in the Participants: window.
 {width=80%}
If the (computer 2 name) MTC/MMC Receive session does not show up in the Directory list, try re-launch Audio-MIDI-Setup.
Video Sync MTC / MMC Setup
Launch Video Sync.
If Video Sync was open already, use the "Rescan Available MIDI Ports" button in the SYNC preferences.
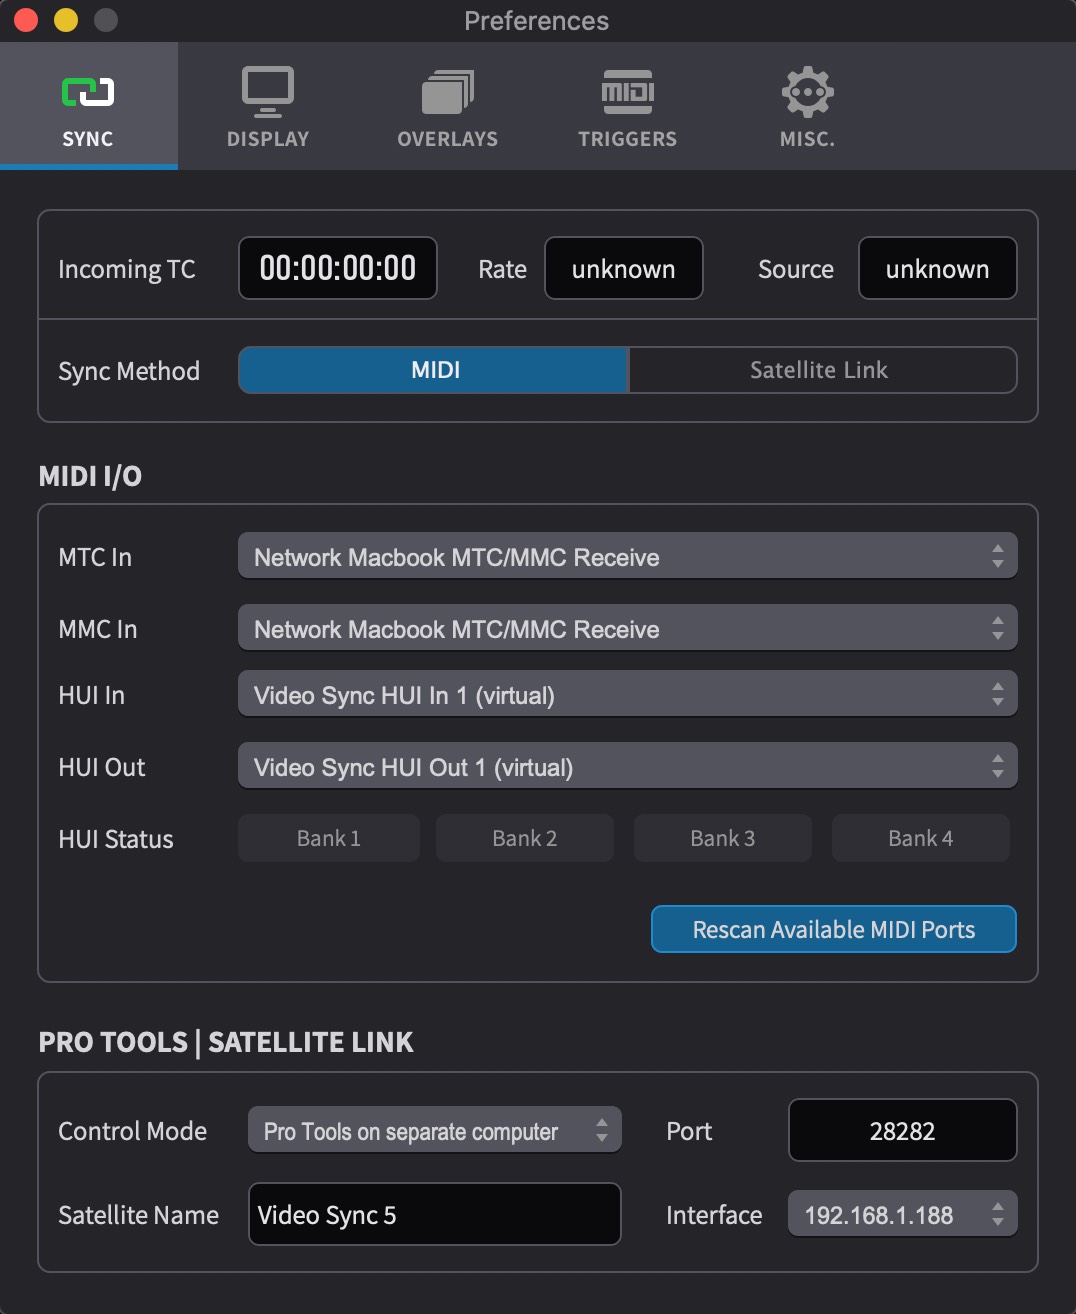
To show the MIDI I/O options in Video Sync, first navigate to the SYNC tab of the Preferences / Settings window.
Set the Sync Source field to Other
Next, select Network (computer 2 name) MTC/MMC Receive in both the MTC In & MMC In fields, as per the image below:
 {width=70%}
Studio One Network MTC (MIDI Timecode) Setup
Before enabling MTC and MMC output from Studio One, the timecode rate and the timecode start position of the song first need to be set up. With a song opened, go to Song → Song Setup. The Song Setup window is shown.
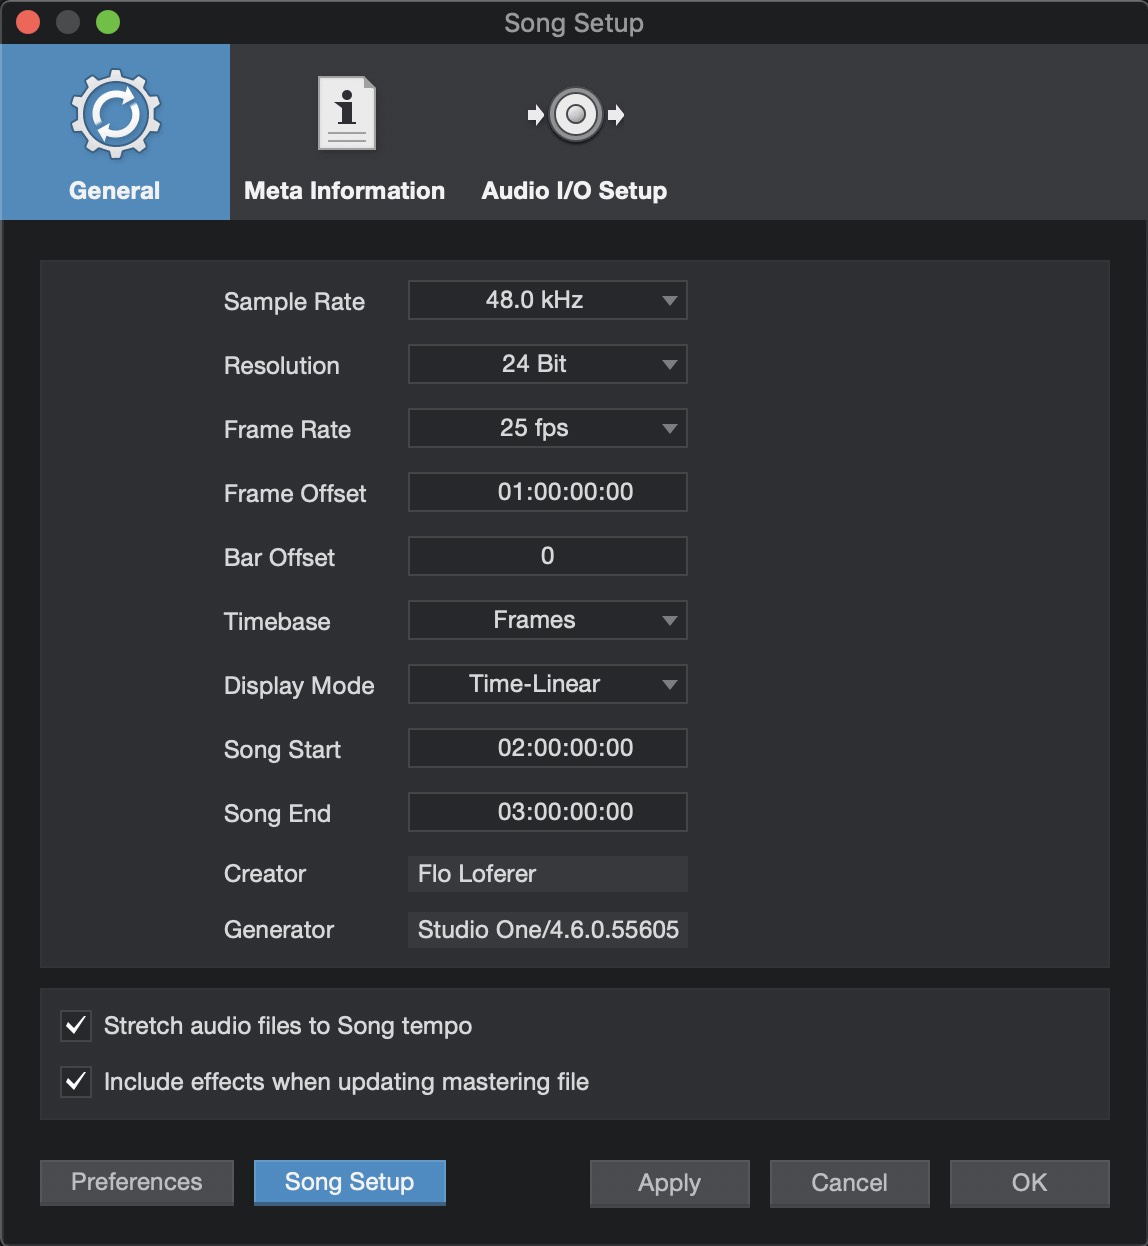 {width=80%}
In the General tab, Match the timecode Frame Rate & the Song Start to that of the Timeline in Video Sync.
It is imperative that these match for stable playback performance.
Set the Timebase setting to Seconds.
Unfortunately there is no option to display timecode in the project timeline, so Seconds is the next best choice to confirming the timecode position matches that of the current Video Sync Timeline.
To have Studio One send MTC and MMC to Video Sync, a new MIDI device must be created. To do that, go to Preferences and select the External Devices panel.
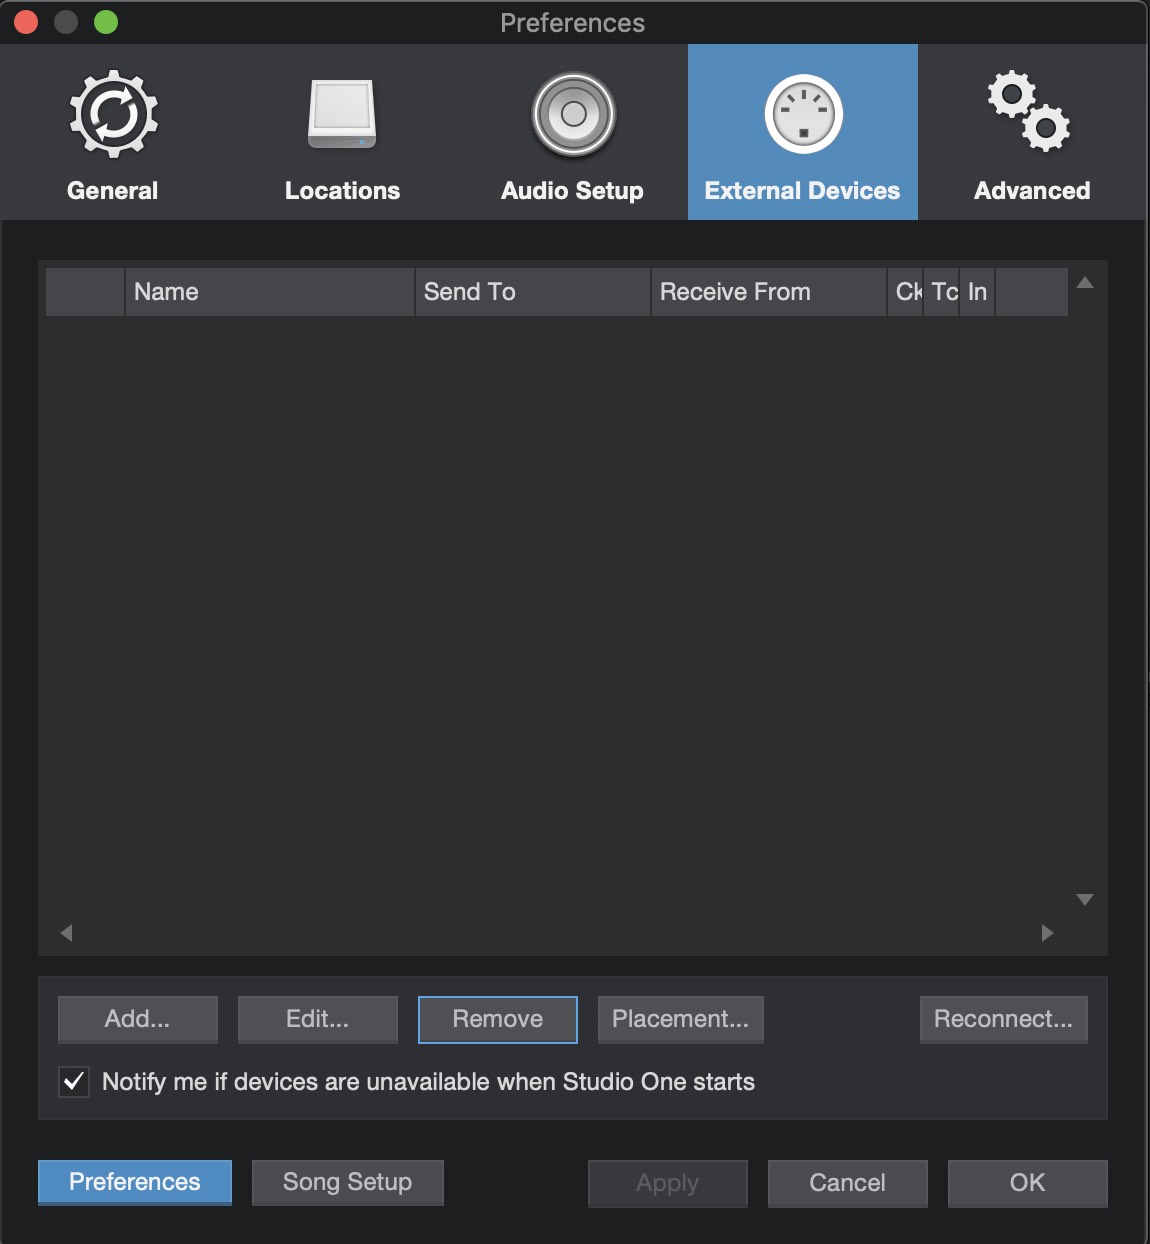 {width=70%}
Click the Add button. In the window, select a New Instrument on the left and call it Video Sync.
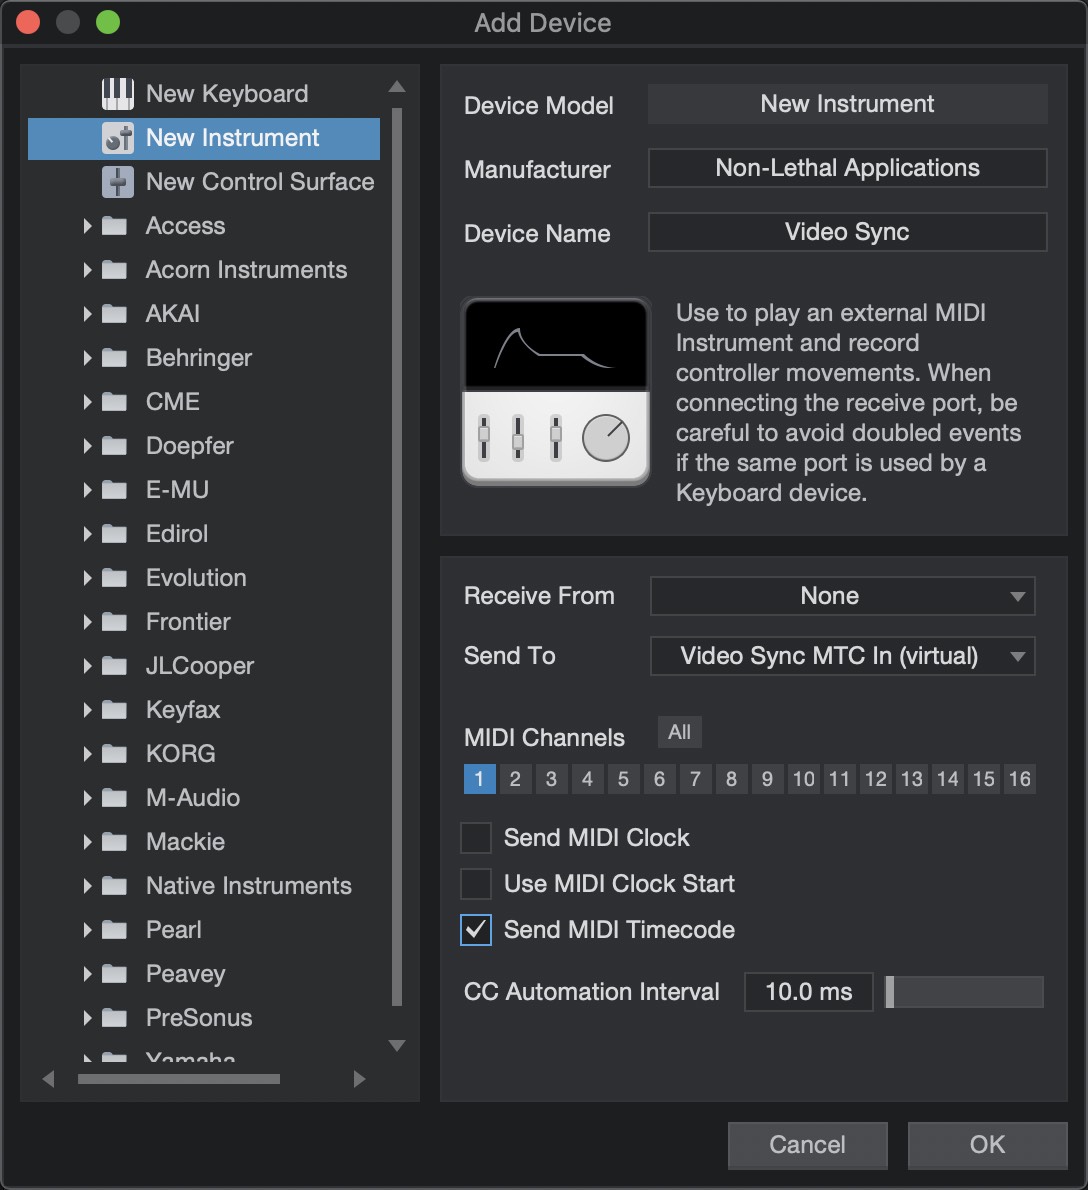 {width=70%}
Non-Lethal Applications may be added to the Manufacturer field - though this step is entirely optional.
In the Send To dropdown box, select Video Sync MTC In (virtual).
Enable the Send MIDI Timecode checkbox at the bottom.
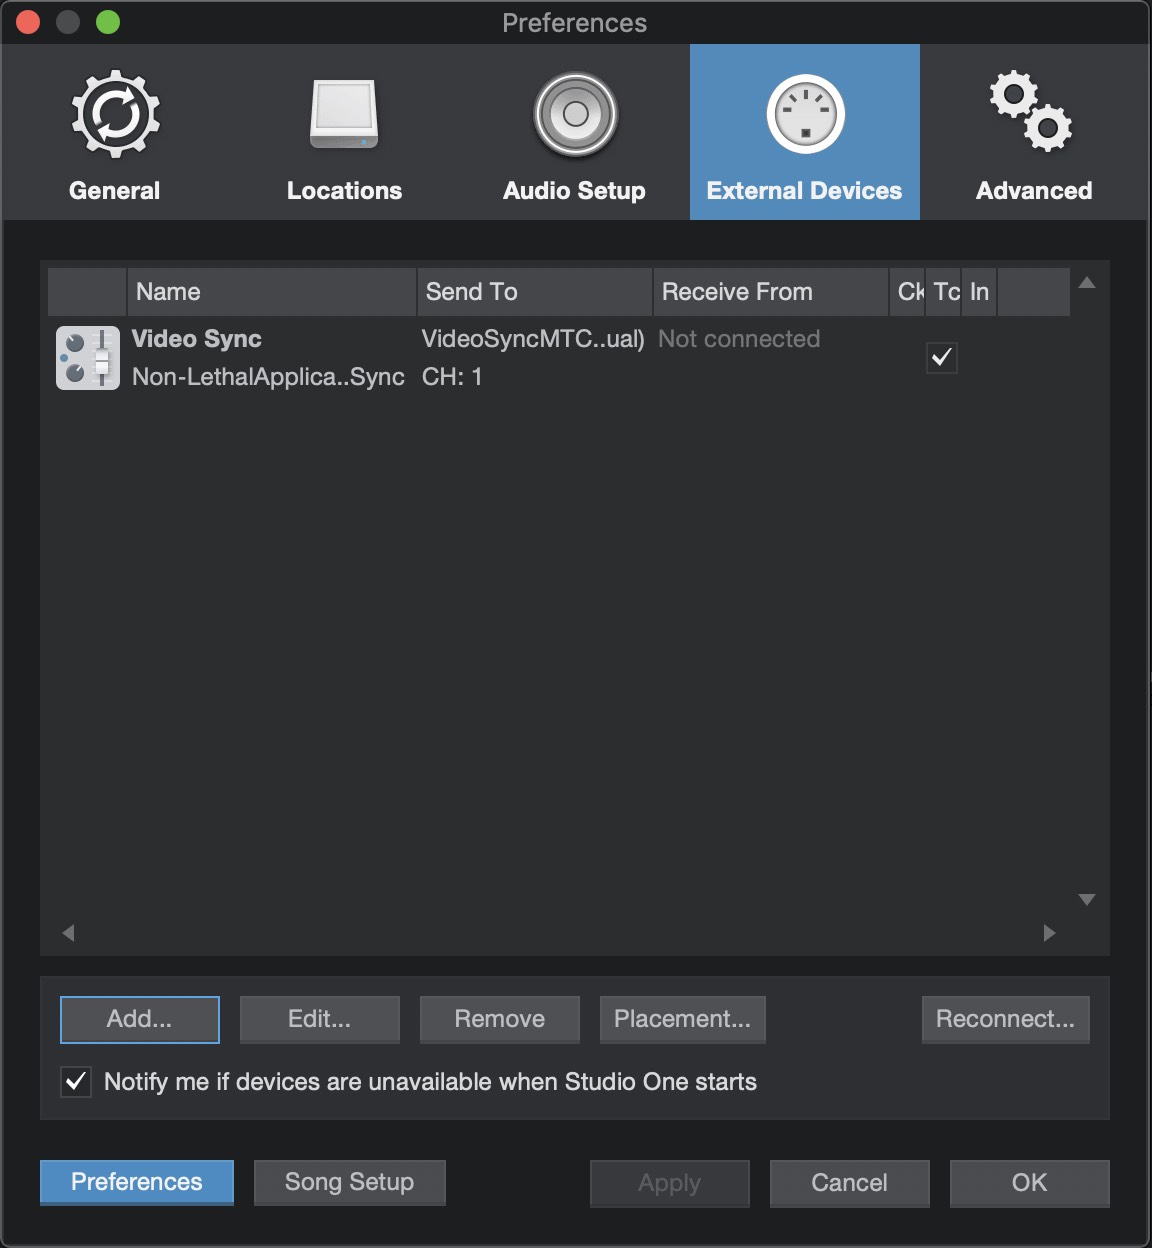 {width=70%}
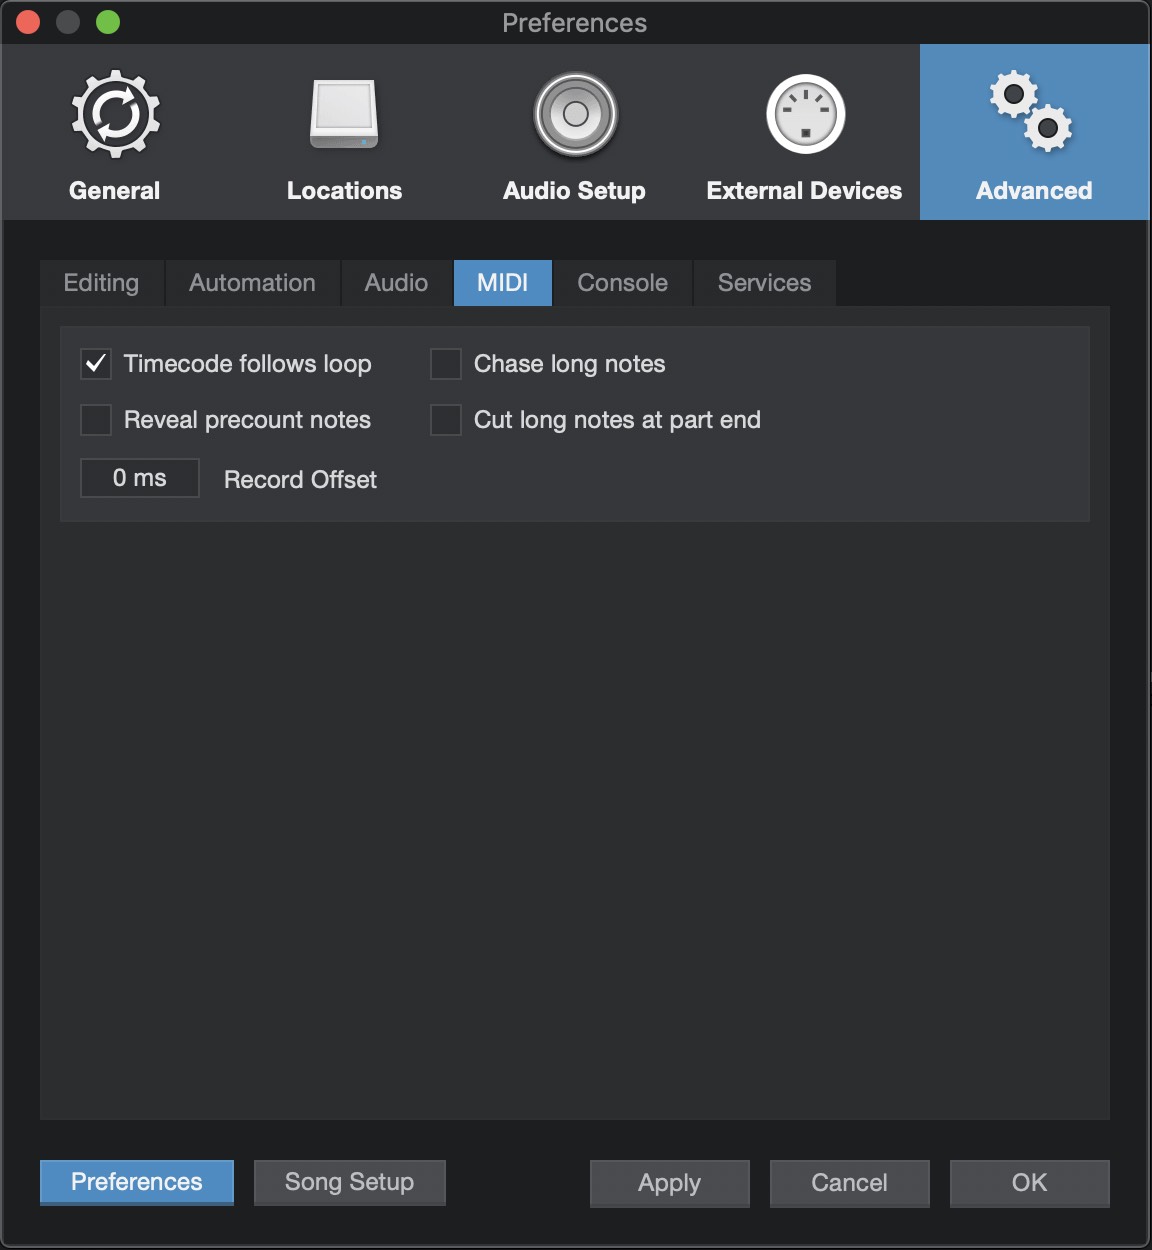
Lastly, go to the Advanced preferences panel, and in the MIDI tab- make sure that the checkbox Timecode follows loop is enabled.
 {width=70%}
Click OK to close the window.
Studio One Network MMC (MIDI Machine Control) Setup
Studio One seems to always send MMC commands to all attached devices. The new MIDI device that was created above for MTC will suffice to also send MMC to Video Sync. This means that no additional setup is required to send MMC to Video Sync.
Enabling Synchronised playback
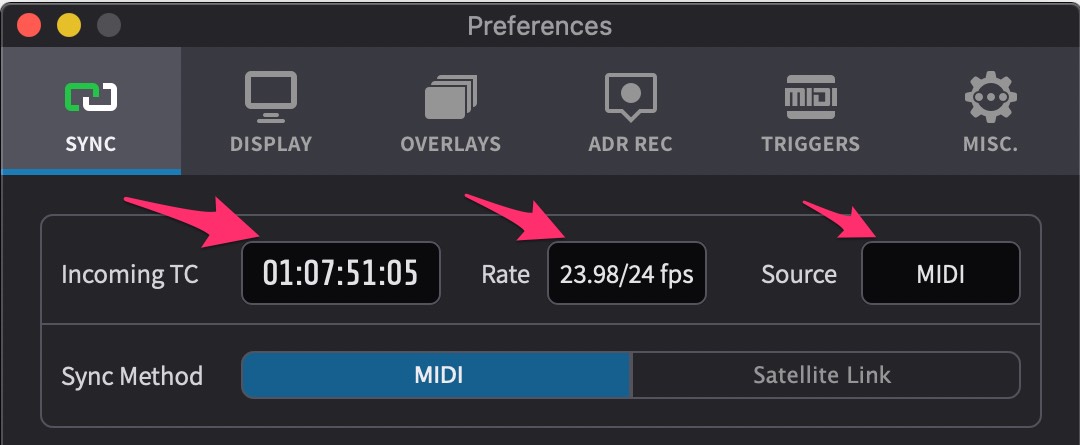
When hitting play or scrubbing within Studio One, both the incoming timecode field should now be seen incrementing & the timecode rate displayed within the Incoming TC section to the left of the main timecode counter in Video Sync.
 {width=70%}
If the Sync button to the left of the transport buttons isn't already blue, click on it to activate it to follow external sync.
 {width=40%}
Video Sync MTC/MMC sync is now online & ready to go. Hit play in Studio One and Video Sync will play back in sync.
Dealing with MTC sync with high frame rate content
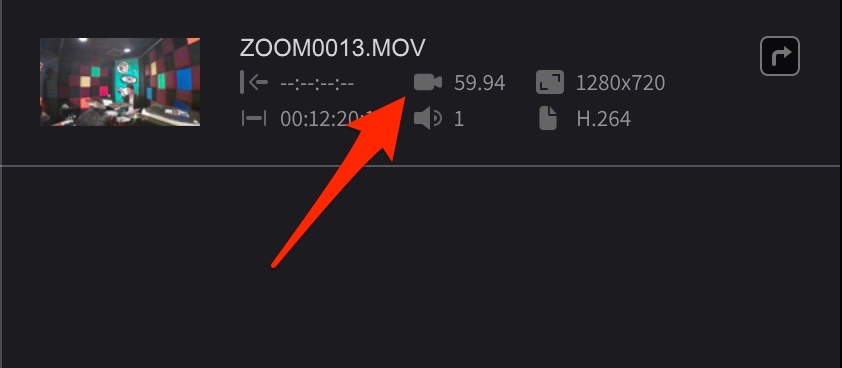
Video Sync allows for synchronised playback of clips running at up to 60 frames per second. Being a standard from the 80s, MIDI timecode (MTC) does not support frame rates higher than 30 frames per second. To be able to play timelines with these high frame rate clips in sync to MTC, Video Sync will try to match the incoming TC at half the frame rate. For example, if the timeline has a 50fps clip, Video Sync will play it in sync if a 25fps MTC source is supplied.
In the timeline list, the timeline frame rate is shown here:
 {width=60%}
